Wednesday, 19 August 2015

A note about fear, and why I'm afraid.

Parisian memories 6

It only just occurred to me that I wanted to talk about this. I sat, wrapped in my duvet, crying and sniffling about how afraid I was about the future. About a job interview, about moving somewhere new, about meeting new people... about the unknown. I want to talk about fear. 

Some people say fear is good for you. Even in Friends, Chandler and Joey tell Rachel about 'The Fear' - about how she should quit her job, and use that 'fear' as inspiration to push towards something new. She does. Chandler himself admits that he, is too afraid. I feel like Chandler. I'm too afraid. I've been on interviews before, in a city that I want to be in, closer to my partner, who means everything to me -  but today, I felt stiff with emotion, afraid of what would happen if I didn't get the job, but also, whats if I did? It would mean leaving my parents, my friends, my current job and moving to a new city, and probably sharing a house with people that I don't know. It wasn't even that I thought a lot about this job interview that I'm meant to be having tomorrow - and maybe that's the concern. The job didn't cross my mind. Only today did I discuss it, and realise, what a horrific mistake it was to apply for such a job. I'm not made of stern enough stuff to do a job like that. I'm too emotional, and I get far too attached to everyone that I meet. Basically, I care far too much, and whilst it's amazing to feel so much for so many, it's also very, very exhausting. A very good friend of mine and her boyfriend broke up, after almost five years together, after he admitted to cheating on her for several months - the news pretty much almost broke my heart, and I couldn't look at my boyfriend (who is pretty much the best person I have ever met) in the eye for quite a few days. 

Everything is personal. I feel the pain of everyone I know, far too much. Feeling like that doesn't scare me; but realising that I'm ageing, with no specific direction in mind, and a serious sense of anxiety that starts to creep over me any time someone mentions the future - that scares me. I know that some people can harness their fear, and there are so many inspirational quotes about overcoming fear ('Do one thing each day that scares you') but what it doesn't tell you, is how to overcome it. I'll admit that I'm scared of the unknown and making the wrong choices, as I already know that I chose the wrong subject to do my degree in (history, btw). I chose something that I loved, and that, in the end, was the worst thing, as it left me with no direction. 

I don't want to make a mistake, at all, ever. I know that people grow from mistakes, and I do too, but I hate making them. I get shaky and sweaty, and then comes the realisation that instead of doing new things, which may cause a mistake, I just won't do it. Therefore any mistakes that I make, are small and inconsequential. The fear of failing and admitting that I've done wrong are holding me back. It's holding me back from moving, saving and living with the person who makes me feel like the fear doesn't exist all the time. The fear has had a hold on me for a long, long time and whilst i'm trying to overcome it, I'm still scared. I hope that one day I'll have the guts to get that new job, new place to live and make new friends in a new city.

This is all a bit *mad keyboard smash* so hopefully it makes sense... it's just something that's been bothering me for a long time. 


SHARE:

Monday, 10 August 2015

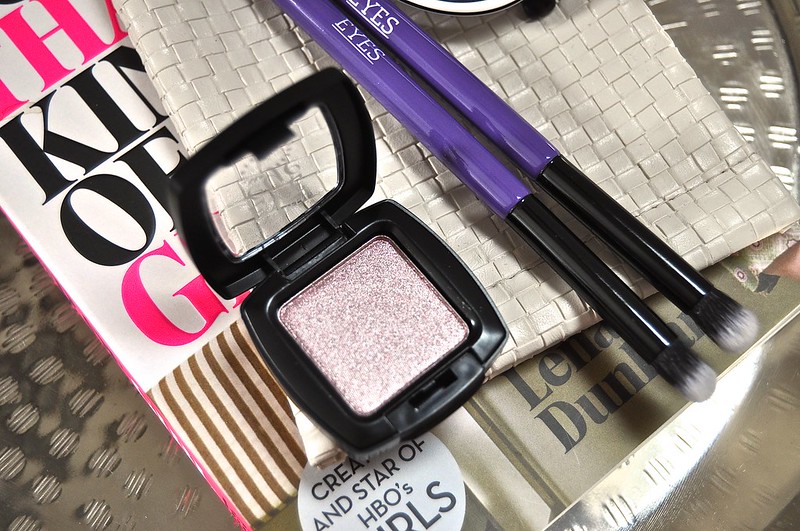
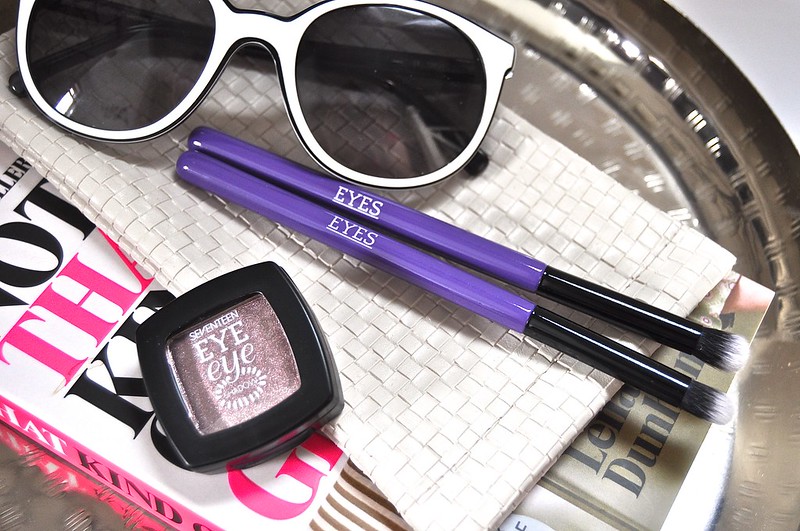
The one wash eyeshadow: Seventeen's Rose Quartz

DSC_0102

I love a good eyeshadow that doesn't require a lot of effort. I call it 'lazy day makeup', and when I have one of those days, only a one wash eyeshadow will do. Who can be fussed with layering shadow after shadow on top of each other, blending, blending, blending until it looks awesome? I can on most days, but as it takes a while to get the look that I want, this is where Seventeen's Eyeshadow Mono comes in, and at less than £4 each (here), these are some incredible value eyeshadows from the chemist/drugstore. I'm a huuuuuge Seeventeen fan, and with their constant release of wonderful products, it makes you wonder why you'd ever pay more than £10 for something, when you can revel in the amazing quality of these products. The main reason why I pay a great deal for a product is a mixture of packaging and quality, also a little bit of the name thrown in, as owning Charlotte Tilbury makes my life a little better. I appreciate the High End spectrum of products as much as I can, but the Drugstore will always have my heart. From when I was young, picking up a lipstick or two from Maybelline, Collection 2000 or Seventeen always gave me such a thrill - and when you can get the same thrill and change from a £5, who can say no to that? Of course there's the danger of simply buying every single shade from every single range, but I see no harm in treating myself to something when I'm having a less than fabulous day. 

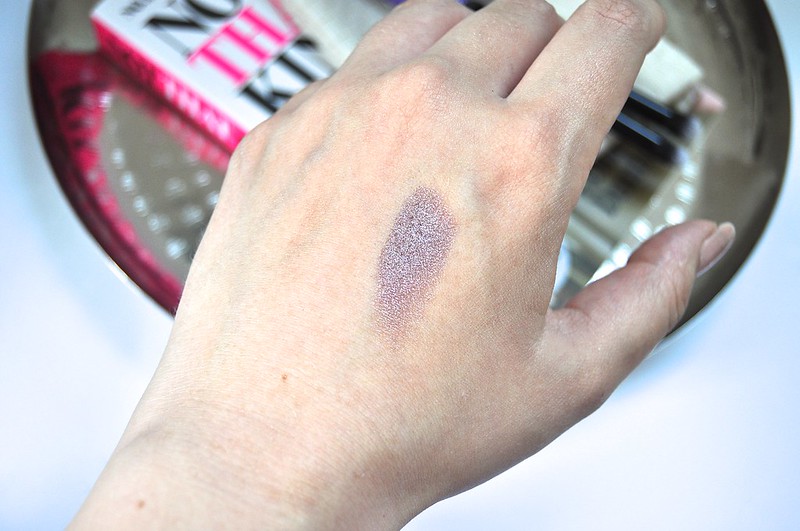
Enter Rose Quartz, an eyeshadow that looks as gorgeous in the pan as it does swatched (see below). In the pan it looks light and sweet, but when worn, there's a almost taupe/greyness to it that I cannot get enough of. It hits with the sparkle all over the lid, but almost descends into a certain smokiness in the crease, as the dark particles of pigmentation settle into the darkness of the eye socket, and make you look as though you've spend ages blending a taupe shadow lightly into your crease. Well, let me tell you, I dapped my brush in, swept it over the lid, blended it out with another brush, and that was it. One dab into the pan, per eye and I was one. There aren't many eyeshadows that I can say that with, but this is quickly becoming a fast favourite, and a go-to for quick, hassle free makeup. The only thing better is that it lasts all day, and I've found that it doesn't crease greatly, so primer or no primer, this stayed on all day with me, making me think that for less than £4, this eyeshadow should be raved about! Is anyone else loving this product or anything else from Seventeen? Let me know!

DSC_0100

DSC_0103
SHARE:

Monday, 3 August 2015

The matte bronzer for pale skinned girls from The Body Shop.

The Body Shop Honey Bronzer 1

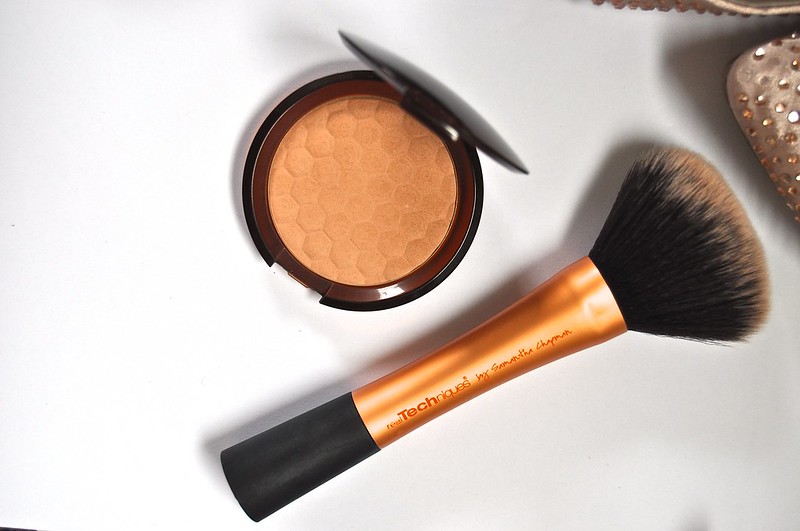
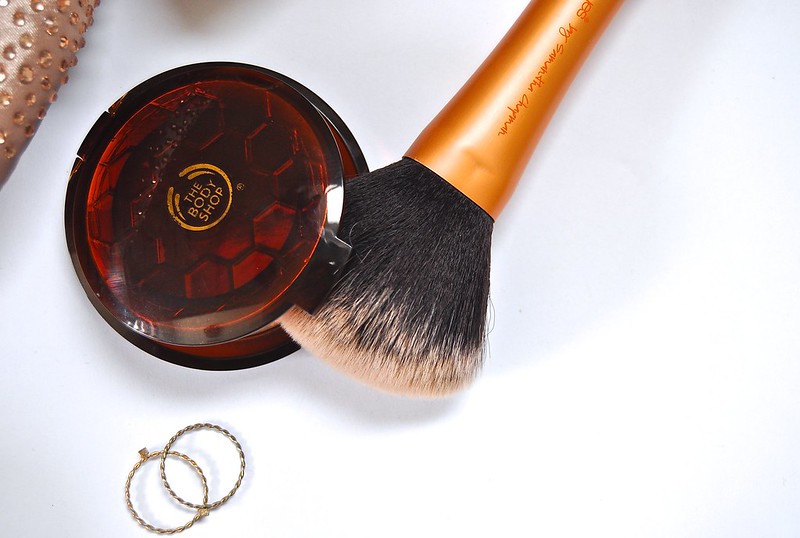
Bronzer for pale skin? Yep. It's a thing. Years ago, for me, bronzer meant orange and sparkly... two things that didn't suit my face at all, unless the sparkles were on my eyelids. But now, with an influx of matte bronzers from all manners of brands, I'm going to speak about one of the first ones that I bought and consequently fell in love with; The Body Shop's Honey Bronze Bronzing Powder in 02. I chose 02 because I was rocking a tan (a tiny bit of a sun kissed glow) from my holiday back in May, and I was determined to keep up the look, as it made me look well and alive (two things I always tend to look for in makeup these days). Despite the colour being 02, and not 01, it's still not orange or too dark, if anything I prefer it to 01 because it does give me that bit of colour, despite my tan having faded. My pale skin doesn't have to worry about looking orange, or having to deal with those dreaded orange lines (tide marks) which I used to have when I slapped foundation on my face at age 13, three shades too dark for my skin. But oh well, we live and learn. 

This is such a subtle colour and one that I find myself turning to day after day, as although it's matte it still gives a little glow, which is perfect for when you want to apply a little makeup, but not have to concentrate too much on it - i.e. the lazy girl's approach to makeup and bronzer. This Honey Bronzer is well loved, so much so, I didn't even wait to photograph it in it's pristine newness, I just swirled my Real Techniques Powder Brush around in it, and started applying. It's a very soft, gentle powder that can easily be layered to increase the amount of definition that you want on your face. All in all, for me, it's a must have for pale girls, because even going into Autumn/Winter, there will still be that want for a bit of colour on the face - and this offering from The Body Shop, is the answer. It's £13 (here) and it's adorable honeycomb pattern makes you want to savour it - but don't, it's amazing formula will blow your mind. The bronzer did originally appear in four shades, but now it's been extended to six, so there is a great deal more choice for different skin tones. If you're unsure however, I would recommend looking into making a little trip to your nearest The Body Shop; however, if you can't, I would definitely recommend looking into doing a bit of research on swatches. I knew 01 and 02 would be the fair/light shades for me, so it only took a bit of narrowing down, I would say 03 and 04 are for light/medium skin tones whilst 05/06 are more for medium/dark skin tones, although I would definitely think that finding a blogger with a similar skin tone would be beneficial. 

Laa from Dolce Vanity used the shade 04 Deep Matte in this post here but I'm not sure as to whether the shade numbers have been changed. I wish there was a more complete swatch selection but with the inclusion of all six shades, not just four. If anyone does have a selection of all six shades, I would love to include it in this post. 

The Body Shop Honey Bronzer 2
SHARE:

Wednesday, 29 July 2015

My new Favourite Eye Shadow Sticks from Gosh.

DSC_0097

DSC_0098

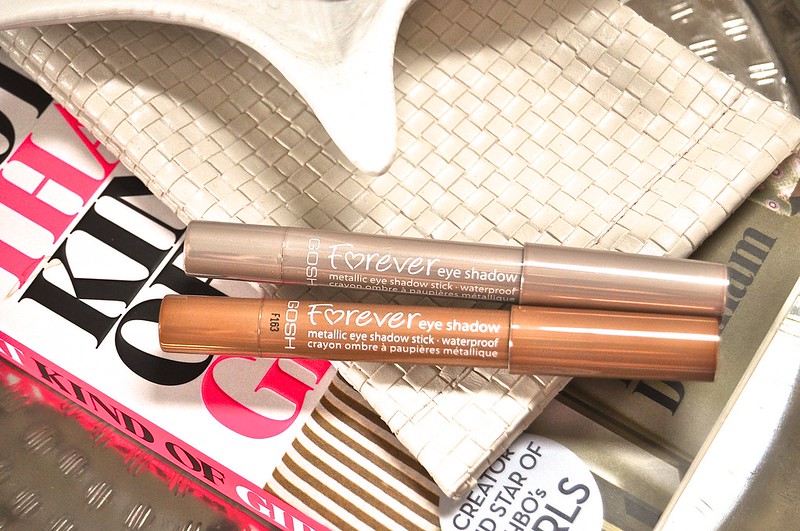
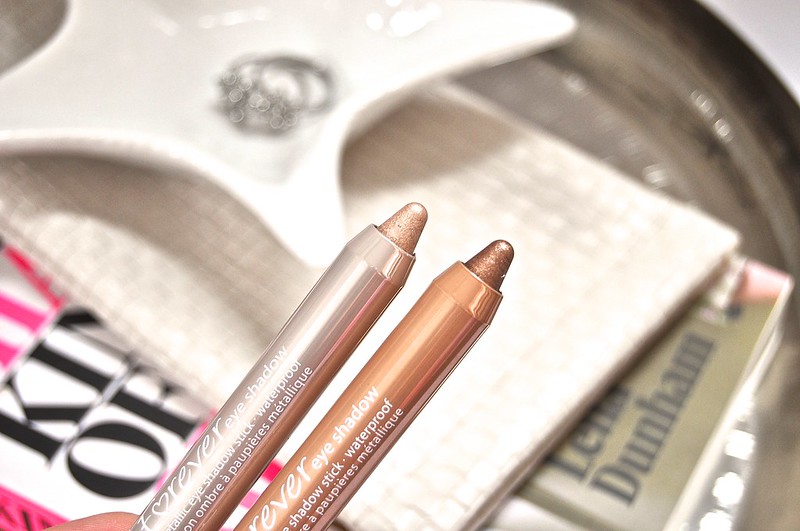
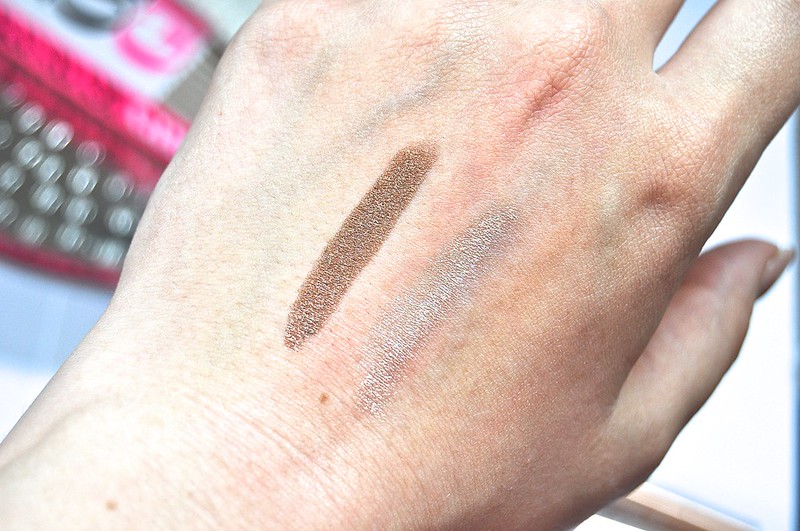
I know it's a big thing to say 'These are my new favourite -' but these are soooo my new favourites. Gosh waterproof, metallic eyeshadow sticks... what more can you ask for? I'll tell you what, a kick ass formula, and these totally deliver. I have two shades, Beige and Light Copper, both of which are so completely appealing that I cannot help but stare at the swatches below. They're creamy once you apply (and you need to work fast, because they'll set and they won't move) and with packaging that allows you to turn up the product, as opposed to sharpening, these two are perfect for fuss-free application. I bought these in a little Superdrug Beauty Store haul (the beauty store is in Cardiff and it's gorgeous) and for a few weeks or so, they sat in my 'to be photographed' pile... but you know what, once I got them out, photographed and swatched, they instantly went into my everyday makeup bag - and there they have stayed ever since. There's something so wonderful about metallic eyeshadow, especially those that come in stick form because there's no hassle, except a teeny bit of blending but that's a given - what's makeup without blending? I apply a layer, blend and then layer up until I get the intensity that I want; it's as simple as that with these.

Beige is more of a soft champagne colour than beige to me, but I think that all depends on the light, as with metallics on the eyes, they often change shades based on the mix in the formula - and this definitely has a shot of gold within it. It's the perfect glimmering base shadow, and when combined with Light Copper it turns in the simplest smokey eye ever. I smudge this on the lashline and in the crease, which is the most gorgeous gentle bronze that has such a wonderful copper glittery shot running through it. For £5.99 each, these are some of the most affordable eye shadow sticks on the market, and I cannot wait to get some more. I pretty much have my eye on all of the other colours in the range, because they're just so damn beautiful - plus, I cannot get enough of the sleek packaging. Gosh do some of the most wonderful packaging, and I don't think they get enough love, so if you're near a stand in the future, go check these out, you won't be sorry. Well maybe you will, as those hand swatches will take a while to come off. Have you tried anything from Gosh?

DSC_0099
SHARE:

Saturday, 25 July 2015

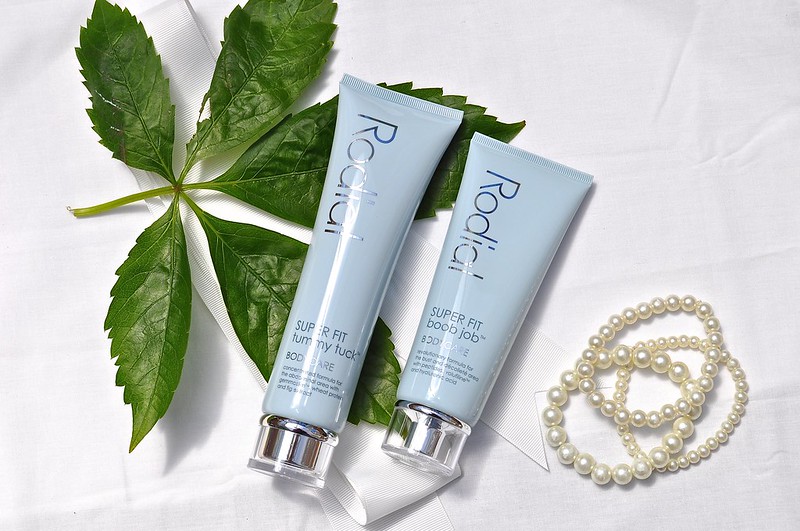
Rodial Super Fit Tummy Tuck and Boob Job Bodycare

Rodial Body Skincare 1

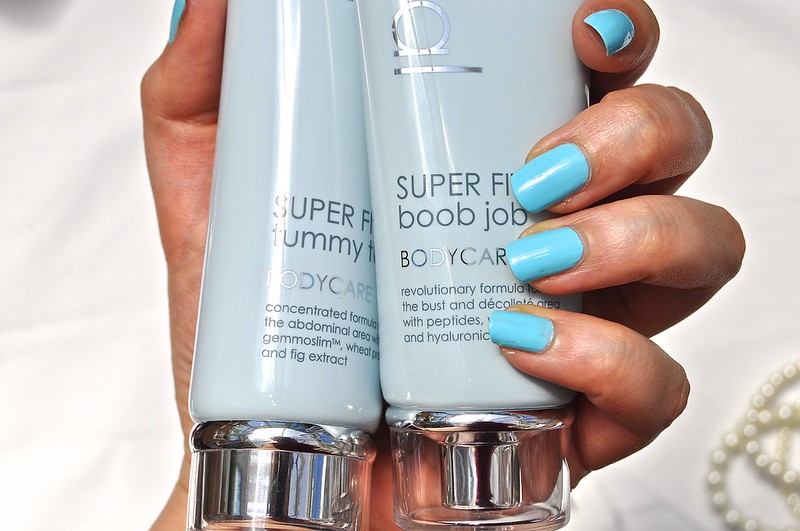
I'm basically going to refer to this stuff as what makes me wiggle less when I walk. There's a good wiggle, like the way Marilyn Monroe walked on the train platform in Some Like it Hot and then there's the bad wiggle, like when I'm bloated and the main wiggle on me are my tummy and my boobs. As a lady with quite big boobs, they do wiggle a lot when I walk, which is something to be expected really, but sometimes you just want to get on with what you're doing, and stop noticing the jiggling that's going on south of your neck. Something that has really been helping when I've been wearing tops that generally aren't turtle necks (i.e. everything, as I don't own a single turtleneck) is Rodial's Boob Job * (£65, here). It helps to promote hydration in the skin, and is a wonderful soft gel texture that sinks into the skin making everything smooth and less jiggly. The phrase 'Boob Job' did slightly concern me, as I don't really want my boobs to get any bigger but for the purpose of blogging, I've been trying this out a few times a week, just to see if it does indeed work. For £65 it has tall claims, but then again, it's infinitely less expensive than an actual operation for breast implants. 

The first thing I noticed was really lovely soft skin, that smelled like aloe vera and looked quite firm. Everything feeling silky soft and well moisturised (with no sticky residue) is how I like my body lotions as who has time to wait for things to adequately sink in before getting dressed/going to sleep? The second thing that I noticed was that everything felt a bit firmer (maybe that's due to all the yoga and everything I've been doing, but hey, something is working) but I always feel like bigger boobs will be wigglier due to there being more tissue around the muscles, so they feel firm but still a bit wiggly: I'm going to count that as a bit of a win for myself. As for whether they increase actual breast size, I haven't noticed any huge difference, but I do feel like I need to go and be re-measured as my old bras don't feel as comfortable anymore as they did before. It may be the yoga, the gel-cream or maybe the doughnuts that are making my boobs look good - all in all, I'm going to continue with all three. I now apply it once every other day and love how smooth it makes my skin feel. Don't neglect your décolletage, fabulous people!

Rodial Body Skincare 2

Another product that I've been trialling in my 'Wiggle-less challenge' is also by Rodial, and it's their Tummy Tuck * (£65, here) gel, which claims to help reduce the abdomen area by up to an inch. I know what you're thinking; these are some very big boots to fill, so let's see if I really did notice a difference. I'm not one of those people who weighs themselves - I'm more of a 'Oh, these jeans feel a bit tight, better skip dessert tonight and have a salad tomorrow' kinda person before walking more and then deciding I need a doughnut as a reward. Or a welshcake... Anyway, Rodial made me laugh again with their very in your face name choice: 'Tummy Tuck' is what people associate with going from an untoned abdomen to something flat and smooth. My skin definitely feels so much smoother when I apply it once a day, but I think once again, yoga and this gel are working as a team as I've been told that I've lost weight (I think the doughnuts are going to my boobs) but as I pretty much see myself everyday, I haven't noticed a great deal sight-wise. My go-to jeans are fitting pretty well these days, so much like with the whole boob moisturising regiment, I'm going to continue with what I'm doing, as it really works for me. 

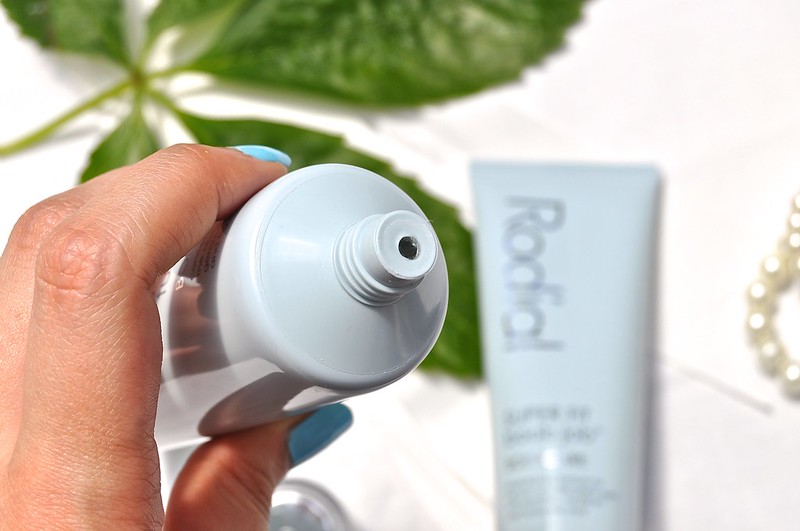
I definitely think these two products work, but only if you're doing something to aid them along their way. Yoga and walking are how I stay active (and keep my back healthy and nimble) and I think that with Rodial's help, everything that wiggles is starting to feel smoother, look smoother as well as starting to firm everything up. The formula of these two products include pomegranate and Hyaluronic Acid, which really help to moisturise my skin and for me, keeping myself and my skin moisturised helps to make everything feel firmer and keep my weigh on a level where I'm really happy. Plus, the packaging is super, super sleek - probably some of the most beautiful looking body care that I've ever used; the combination of soft blue and shining silver is always a winner for me. Have you tried anything from the Rodial Bodycare range? Do you fancy trying out these firming gels?  

Rodial Body Skincare Tummy Tuck Boob Job 3
SHARE:

Wednesday, 22 July 2015

How to: my pin-point concealing and layering of concealer.

Pin point and layering concealer

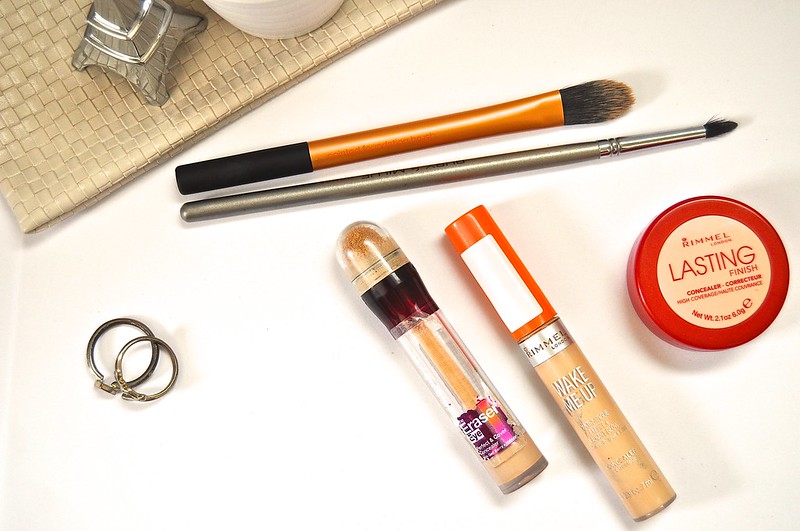
I first came across pin-point concealing via the wonder of Lisa Eldridge and her Youtube channel, since then, one of my most loved makeup videos from her has been her look of creating 'Natural, flawless skin' and can be seen here (totally recommend this!). It's an idea that instead of slathering on lots of concealer over a blemish or redness on the skin, instead you conceal small areas using a technique with a pointed brush - pin point concealing has basically changed the way I apply makeup and how I cover up any spots on my face. I generally tend to use three different concealers for covering dark circles, evening skin tone, and covering blemishes as not only are there different tones to skin, but depending on where the blemish is, can depend on what type of concealer I choose (stick, cream, liquid etc). My three concealers are in three different shades, starting from the lightest (shade) and it's Rimmel's Lasting Finish Concealer (£5.49, here), Rimmel's Wake Me Up Concealer (£5.49, here) and Maybelline's Eraser Eye Concealer (£7.99, here). All three are very different, and I always blend them in different ways, into the skin. 

Pin Point Concealing is what I do after my foundation has been applied and buffed in; then I look at all the extra areas that need a little bit more help, such as my under eyes, redness around my nose and cheeks, as well as any little blemishes I might have. Lisa says to use the thinnest brush possible for pin point concealing, and whilst I do agree with her, I've found that I had to find the right brushes for me, and those are brushes from Ruby & Millie (Pointed Concealer Brush) as well as from Real Techniques (pointed foundation brush). I also tend to blend a little with my fingers, as well as a fluffy eyeshadow brush if I feel like the edges of certain concealer covered blemishes need to be buffed in. For small blemishes like ones on my forehead, I dab the smallest amount of Wake Me Up concealer on my hand, before dipping my Ruby & Millie brush in, and then applying it to the area, before softly blending with my fingertip. Now, my nose tends to get very red, and requires a good amount of concealer to combat the colour - instead of using a brush to apply, I simply apply from the wand of Wake Me Up concealer and then buff into the skin, with a combination of RT's Pointed Foundation Brush and my fingers, as I want everything to be blended seamlessly, and I can never seem to find a clean fluffy eyeshadow brush when I need to do this - so I make do with what I've got. 

If I've got a major spot, one so big that requires its own post code and stylish wardrobe, then I know that my pin point concealing has to be on form (or on fleek, if you will). I seem to be getting a few around my mouth and chin, looking like a spider bite piercing without pain of piercing anything on my actual face. These kind of blemishes take some extra care. This is when I tend to mix a dab of Wake Me Up and Lasting Finish together, in order to get a flawless finish using a fine pointed brush, I tend to dab a bit on and then blend ever so softly with my little finger (I know, I know, we're using basically every finger in these two concealing tricks - see below for more finger blending) as it's small enough to gently buff the edges away, but if I do find a free and unused fluffy eye shadow brush, then that's exactly what I'd use to blend the edges. 

Layering Concealer under my eyes is something I've learnt to do since realising that no matter what, my dark circles just aren't going to budge, no matter what eye creams or skincare companies say; they're hereditary and here for good. So, in the effort to not look permanently exhausted, I've taken to layering concealers and this has totally changed my way of applying under eye makeup. Because the skin is so thin under the eyes, I don't want to heave on lots of makeup, as it'll only crease - which isn't a good look for me. I try and apply thin layers, blending fully before seeing if I need another layer. My first layer of concealer is Rimmel's Wake me up Concealer and is perfect for brightening the under eye area, as well as the inside corner of the eye, which for me, can always benefit from some illumination. As this is a liquid, it can be layered itself to increase coverage, but I like to apply a single layer with my Real Techniques Pointed Foundation Brush as it gets right into the corners of the eye. After that, I apply a few little dabs of Maybelline's Eraser Eye Concealer to try and disguise the deep purple of my dark circles, as it has a certain peachy tone to it, that I find covers them very well. I tend to blend this out with my fingers, mainly my ring finger as it has the lightest touch and won't stretch the skin. Then, I use Rimmel's Lasting finish Concealer and press that onto the skin very lightly with my middle finger, before once again blending out with my ring finger. It's possible to layer concealer without using any brushes at all, so if you're on the move, and don't have any brushes but have dark circles galore, then no need to fret, clean fingers are as good as any brush. 

I've listed three products that I use everyday but that doesn't mean that a palette isn't going to be an easier option for you. Makeup Revolution's Ultra Cover and Conceal Palette (here), Sleek's Makeup Corrector and Concealer Palette (here) and Mac's Pro Conceal and Correct Palette (here) are all different prices but are all products that I have seen recommended for their concealing benefits, so if you'd rather carry around one palette than a handful of products, I would definitely recommend looking into one of these. Do you pin point and layer concealer? 


SHARE:

Thursday, 9 July 2015

Makeup Inspiration from Pinterest #2

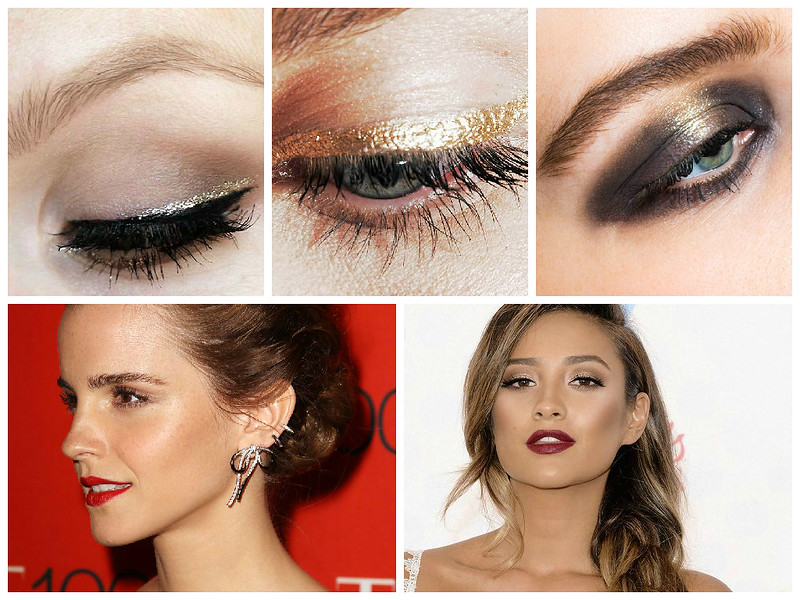
makeup inspiration pinterest
Pin #1, Pin #2, Pin #3, Pin #4 and Pin #5

I have a board titled (you guessed it) 'Makeup Inspiration' on Pinterest and not only do I love pinning, and expanding that folder, but I love scrolling through it late at night, when I'm thinking about what makeup I want to do for the next morning, or for an evening out with friends. It doesn't have to be anything too 'out there' but it can be a simple red lip with a brown liner cat eye - something simple, but different i.e. something I wouldn't have originally thought of. I did a post a few months ago on my makeup inspirations from Pinterest (here) and now that i look back on it, not that much has actually changed. Glowy skin, coloured liner and statement lips tend to be the three things I look for in a makeup look, and these five pins above have a combination of them all, plus they include the amazing Emma Watson and Shay Mitchell.

The first two pins are all about metallic liner, which I looooove the look of: whether it's silver or gold, these two looks step away from the black classic flick, and instead replace it with something fresh but still something that makes a statement. It's glitzy without being too much, and I love the simplicity of a flick of gold/silver without having to do an awful lot of blending with numerous eyeshades. Simplicity at it's best.  Now the third image has taken blending to a whole new level for me, as first of all, I never go that far up the eyelid, and second of all, that highlight of gold in the middle of the eye makes this look for me. It's deep but not too dark, like a taupe/charcoal with something bronze and metallic in there - it's a look that I cannot quite pin down (haha) but I assume is a mixture of multiple shadows. I love it, and it's even inspired me to take my shadow a bit further up the eyelid - dramatic and smoky, two things I love for when I fancy focusing on the eyes on a night out.

Two celebrity looks, that I love no matter what they wear/what makeup they have on, belong to Emma Watson and Shay Mitchell. Whilst Emma is more glowy and natural with a true red as her lipstick, Shay vamps it up with contoured cheeks and an oxblood red lip. Two different looks, but nonetheless very lustworthy. With fluttery lashes, sweeps of bronze on the eyelids and highlighted skin, these two ladies have nailed a statement lip two different ways, and that gives me so much inspiration. Whether I fancy a glowy, bronzed look or something more structured with hollowed cheekbones, these two fabulous women do not disappoint. Not only are they wonderful actresses, people and fashionistas, they also rock some serious makeup looks. What makeup looks are inspiring you right now? And another shameless plug, but my Pinterest can be found here
SHARE:
© bexhowells. All rights reserved.
Blogger templates by pipdig